DIY Re-foaming Speaker Drivers

Do It Yourself
Status
Not open for further replies.

pustelniakr

Silver Miner at Large
Introduction

Most vintage speakers used foam rubber surrounds for the outer suspension on the driver cones. Over time, this rubber suffers in the same way as most rubber, manifesting a sort of dry rot. Ozone in the atmosphere is not kind to rubber (belts, drive tires, speaker surrounds, etc.). Frequently, speaker owners simply discard the damaged speakers, or put them up for sale at very affordable prices. For example, I picked up the speakers I will use for instruction at a thrift store for $12 for the pair. This was actually my very first re-foam job, and I have done many since then. I even picked up a pair of AR9s for a song, for the same reason.

If you are careful and patient, you can do your own re-foaming, like I do. This thread is intended to show you how it is done.

Enjoy,
Rich P
 
Last edited:
Our Patients for Today's Procedure: EPI A500

The EPI A500 speakers were created to be AR9 killers, at half the original purchase price. In fact, they hold their own quite well against the AR9s I have. The A500s do have a more west-coast sound, compared to the more east-coast sound of the AR9s, but on the bottom end, they are pretty much indistinguishable from the AR9s. That is saying a lot, since the AR9s have 2 side-firing 12" active woofers, and the A500s have a single 10", deep throw woofer, driving 2 12" side-firing passive drivers. One notable characteristic of both of these speaker models: they are both quite power hungry. I drive them with a Yamaha M-80 power amp, which makes them sing quite nicely.

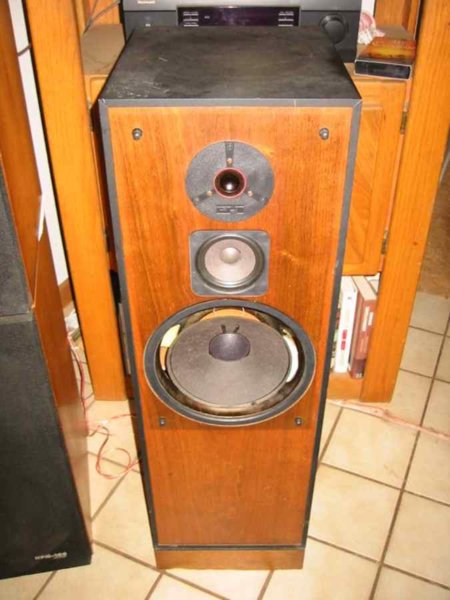
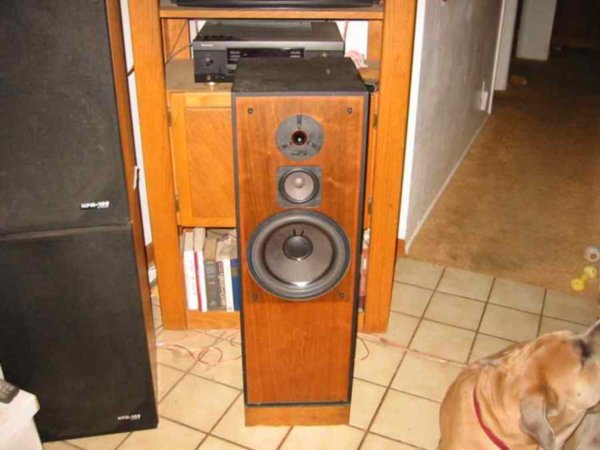
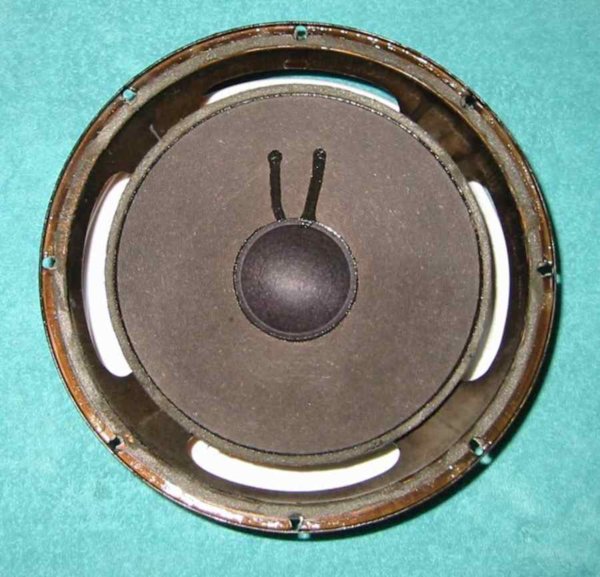
When I got them, the surrounds of the 10" woofers were completely gone (rotten out of existence).

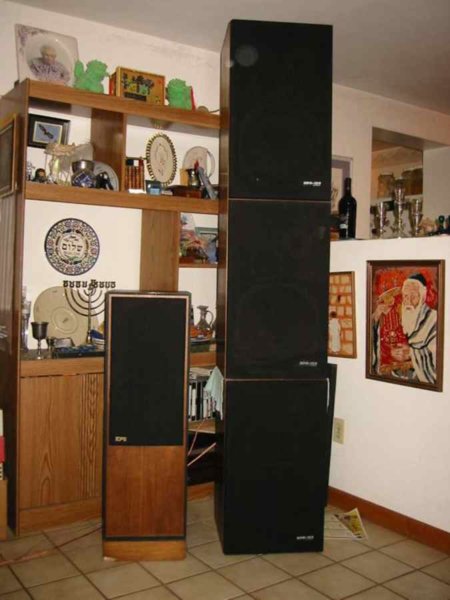
The 1st pair of pics show my A500s next to my triple stack of HPM-100s, for size comparison purposes. The 2nd set of pics show the A500s in their initial condition, without grills to reveal the woofers to be re-foamed.

1-L-Spks.jpg

2-L-Spks.jpg

3-L-A500.jpg

4-R-A500.jpg

Enjoy,
Rich P
 
The Finished Product

Here is where you decide where the process is worth the effort.

The following pics show the results of the re-foaming operation. These puppies sound really excellent. They are not as efficient as the HPM-100s, requiring more power for the same sound pressure level, but they are amazingly full ranged, especially considering the fact that they have 10" woofers (and 2 12" passive woofers, one on each side). They have really crisp highs, full midrange, and a deep, amazing base.

5-L-Done.jpg

6-R-Done.jpg

Enjoy,
Rich P
 
The Re-foam Kit

Here are the re-foam kit specifics:

I obtained the re-foam kit from:

John McPeak at
McPeak Sound Co

I was very impressed with every aspect of this kit source. In order to order a kit, you had to fill out a detailed questionaire, which was used to determine exactly which kit you needed (all woofers are NOT the same). You then made arrangements for payment and shipping. The kit arrived within 4 days of purchase, and was exceptionally well packed (all components safely secured in the package). It would have been quite difficult to damage any part of the kit during shipping.

The kit contained:

  • A printed set of instructions that was informative, well illustrative of each step, and complete. I had no problem following the instructions.
  • A set of voice coil shims (3 different sizes, I used 2 of them).
  • A couple of alcohol pads and a small square of coarse sandpaper to dress the cone edge before gluing
  • A container of glue and an applicator tip (the glue was exceptional, acting much like contact cement, but forgiving enough to allow repositioning as needed)
  • A couple of q-tips and brushes to assist in spreading the glue and touching up
  • The surrounds (perfect fit, I must add)
  • The replacement dust caps (to use the shim-method you will have to cut the old dust caps off), that are just slightly larger in diameter, to compensate for the remains of the old ones.
7-Kit.jpg

Update: Over the years, the source I used for the re-foam kit above has disappeared. However, this new source seems to have just about whatever you might need to do this work, and has many pre-made kits for your use, for most speaker brands and models. So, if you want to join in the fun of doing your own re-foaming, you can try here for what you need:

Simply Speakers

Enjoy,
Rich P
 
Last edited:
Before/After Views of Drivers

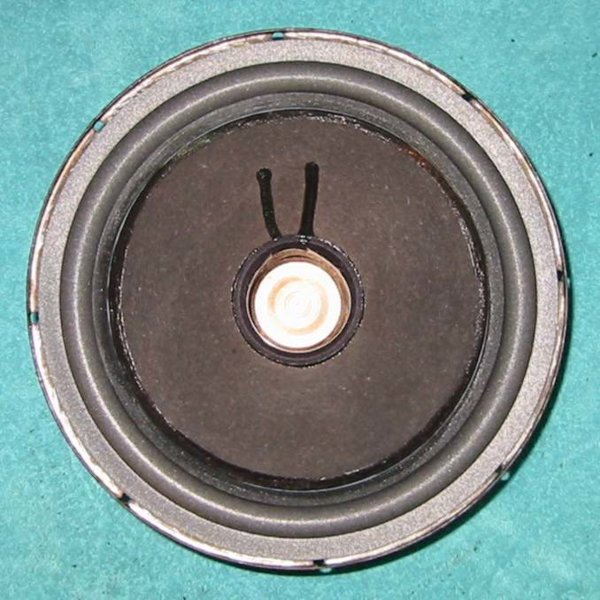
Here are pics of the drivers, before and after the re-foaming operation.

Note: Before you remove the speaker drivers for work, take special note of which wires are tied to which driver terminals. Write it down. It matters that you reconnect the drivers like they were originally. It relates to driver phasing, which can make or break speaker sound-stage and imaging.

8-Orig.jpg

9-Final.jpg

Enjoy,
Rich P
 
Last edited:
Step 1 - Clean Off Old Surrounds

Before you can put on the new surrounds, you will need to clean off the remains of the old ones. Being rotten, they should come right off with tools of various edges, including fingernails. If it takes alot of pressure to get the rotten foam off of the cone, you might want to remove the dust cap and shim the voice coil now, so the voice coil doesn't get damaged from rubbing them on the edges of the gap in the magnet. This is a choice to be made carefully, since you want to make sure that nothing gets into the gap (like bits of surround or adhesive).

I used acetone to get the old glue off. It does not tend to dissolve the paper in the cone.

Here you see before and after pics of this stage:

10-Start.jpg

11-Clean.jpg

Enjoy,
Rich P
 
Step 2 - De-cap and Shim

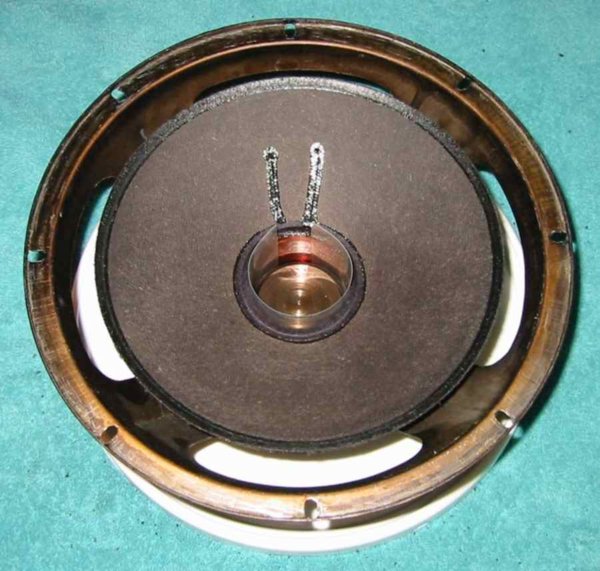
The next step, you MUST cut the dust cap off, if you are going to shim the voice coil. In my opinion, this is the best way to ensure that the voice coil is properly aligned in the slot in the magnet. If not properly aligned, the voice coil will rub, and you will have to start all over again.

Cut the dust cap by degrees, from the center to the stopping point, to ensure that you do not cut the voice coil form or the voice coil wires. There is no need to cut the cap off at the cone, in fact you should leave a significant amount, to ensure you don't cut something critical.

The next pics show the caps removed and the shims installed.

12-NoCap.jpg

13-Shimd.jpg

Enjoy,
Rich P
 
Step 3 - Glue Inner Edge of Surround

The next step: Lay a bead of glue down around the inner edge of the surround, and spread it evenly over the inner mounting surface. Then, lay a bead around the outer edge of the cone, and spread it evenly over the surface to receive the surround. Note: Some surrounds are mounted to the underside of the driver, so change this step accordingly.

Here, it truly helps to have a platform that rotates, like a Rubbermaid Lazy-Susan. You don't need it, but it sure helps.

After both glue deposits dry to a lightly tacky surface (like contact cement), Lay the surround in place and lightly pinch the glued surfaces together, at points opposite one another (like tightening the lug nuts on an auto wheel). Then, lay a bead around, where the inner edge of the surround meets the cone, and spread it a bit toward the center, and up over the mounting lip of the surround (not over the roll).

14-InGlu.jpg

Enjoy,
Rich P
 
Final Step - Glue Outer Edge

Lay a bead of glue around the inner edge of the mounting flange of the speaker frame. Pay particular attention to laying a bead around each mounting hole, to ensure a good seal. Then lay a bead just inside the outer edge of the mounting flange.

Now just lay the outer edge of the surround into the glue beads, in a similar pattern/sequence as you would tighten the lug nuts on an auto wheel. Hold the surround down with some kind of clip (I used clothes pins). Make sure you do not distort the surround shape, or move it from the place it naturally lays (as governed by the voice coil, shims, and spider).

Then, pinch a bit of masking tape, to use as a handle, onto the top surface of the new dust cap. Then lay a bead of glue on the dust cap mounting flange, and place the dust cap in place on the cone, followed by a bead of glue laid around the dust cap, where it contacts the cone. Remove the tape handle when the cap is placed as desired, and dried in place.

15-OtGlu.jpg

Enjoy,
Rich P
 
Status
Not open for further replies.
Back
Top